Showing posts with label CSS styling. Show all posts

How to Change Bullet Point Style in Blogger (Blogspot) Lists

In Part 1 of this three part series of Blogger tutorials I discuss how to change bullet point styles of lists you may want to include in Blogger posts. This first Blogger tutorial deals with unordered lists and how these can be styled using CSS in Blogger (Blogspot). The second part of these tutorials will deal with ordered lists while part 3 discusses bullet point changes you can make to your sidebar, footer and menus.

Today you will learn how to:
  • change the style of bullet points in unordered lists
  • add bullet points to unordered lists if they are absent
  • add an image instead of a bullet to lists in your Blogger posts

This tutorial is rated easy and is designed so that even Blogger newbies can make the changes they want to their Blogger template. Changing the bullet point style involves changing the CSS styling in your Blogger template (Blogspot template). Join me as I walk you through this step by step guide.

How to Add Bullet Points to a Blogger Post
If you are still using the old Blogger editor you will need to add bullet points manually to any unordered lists you create in Blogger posts. If you are using the new editor the work is done for you. Either way though this is the type of code that generates unordered lists:
<ul><li>Create your own list markers in Blogger</li>
<li>Create unordered lists in Blogger</li>
<li>Create bullet points in Blogger</li>
</ul>

Any text can be placed between the two <li></li> tags. Simply copy this list into a Blogger post and substitute your text for mine and you will have an unordered list.

Circular Bullet Points
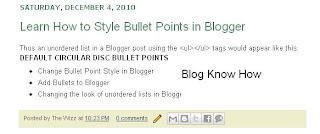
Circular bullets (also known as markers or discs) are displayed in Blogger by default whenever unordered lists appear. This means that whenever the <ul></ul> tags are used in Blogger posts a leader dot or disc will appear before each line of text denoted by <li>. (Note I will discuss ordered lists <ol></ol> tags in part two of this tutorial).

An unordered list in a Blogger post using the <ul></ul> tags would appear like this:
  • Change Bullet Point Style in Blogger
  • Add Bullets to Blogger
  • Changing the look of unordered lists in Blogger


We can make lots of changes to the look of these filled discs or filled circles by changing the CSS styling in Blogger. For instance we can have squares, or we can choose to have no bullet point at all. Here's how.

To Add Square Bullet Points to Blogger (Blogspot)
The following code will replace the filled circle bullet points with squares instead:

  1. Login to Blogger if not already logged in

  2. From the Dashboard go to Design >Edit HTML

  3. Back up your template

  4. Find the posts section of your CSS stylesheet which will be before ]]></b:skin> tag

  5. For the following default Blogger templates eg "Simple" add the following CSS code to the post section like this

    .post ul li {
    list-style: square;
    }


  6. Save template and view blog post to see the circular bullet points have been replaced by square ones


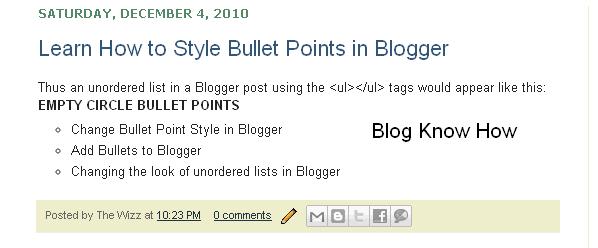
To Add Circle Bullet Points to Blogger (Blogspot)
To add unfilled circle list markers or bullet points to Blogger posts do the following:

  1. Follow steps 1-4 as per square bullets

  2. Add the following code to the posts section of the CSS stylesheet of your Blogger template by entering the following code:

    .post ul li {
    list-style: circle;
    }


  3. Save the changes to your template and view a blog post to see the empty circle bullet points


How To Indent Bullet Points in Blogger
There are two ways to increase the indentation of list style markers or bullet points.

  1. Using the Inside or Outside Element
    The indentation of bullet points can be varied using the "inside" element. By default the list will be "outside" unless the "inside element" is used. The following code shifts the indentation of the list further to the right.

    .post ul li {
    list-style: circle inside;
    }


  2. Custom Indentation CSS Styling
    It is also possible to add custom indentation styling to lists. For instance here I have added a 2.5em indent using the following code to the circles example:

    .post ul li {
    list-style: circle;
    margin-left: 2.5em;
    }


How To Replace Bullet Points with an Image in Blogger (Blogspot)
Sometimes you may prefer to have an image list marker or icon instead of a bullet point. You will need to host your image somewhere such as a free image hosting service eg Flickr or Photo Bucket. Follow the steps below to replace bullet points in your Blogger posts with an image

  1. Follow steps 1-4 as per square bullets

  2. In the CSS styling of the posts section of your Blogger template and before the </head> insert the following code:

    .post ul li {
    list-style: url("http://URLaddressofImage.gif");
    }


  3. Replace URLaddressofImage with the URL address of the image you have uploaded to an image hosting service. Note in most cases the file will have a .gif extension. If the extension is anything other than .gif you will need to change this too.


  4. Save the changes to your Blogger template and navigate to a post page to see your image list marker installed


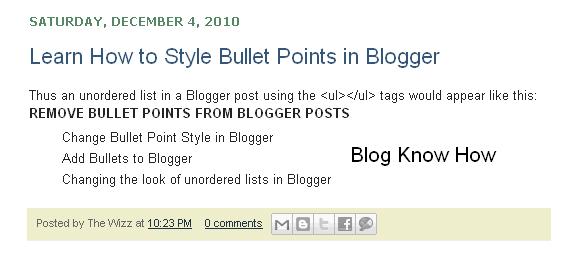
How to Remove the Bullet Points from Blogger Posts
If you are going for a minimalist look you may prefer to have no bullet points in the lists in your Blogger posts. In this case:

  1. Follow steps 1-4 as per square bullets

  2. In the CSS styling of the posts section of your Blogger template and before the </head> insert the following code:

    .post ul li {
    list-style: none;
    }


Related Articles
List of Blog Know How Tutorials for Blogger Blogs
How to Add CSS Styling to Blockquotes in Blogger
How to Add, Delete or Remove Blogger Image Borders
How to Align and Justify Posts in Blogger
How to Add a Divider Between Blogger Posts
How to Add or Change a Background Image in a Blogger Template


Read more ...

How to Highlight Author Comments in Blogger Posts

In this Blogger tutorial I will show you how to highlight the author comments section of your Blogger template (Blogspot template) using CSS styling.

Benefits of Adding CSS Styling to Author Comments
If you are using a default Blogger template chances are it is difficult to differentiate between comments made by visitors and comments made by you, the blog author. If you only have a few comments per post that may not be enough of an issue for you. If however, you have some posts with lots of comments you may need to make your remarks stand out from those of your visitors. We can do that by adding CSS styling to highlight your author comments.

What Will I Learn in This Tutorial?
In this Blogger tutorial you will learn how to easily add some highlighting to your comments so that they will never get lost in the crowd again. This requires a small amount of tweaking to your Blogger template which is not difficult to do if care is taken. The image below shows one example of what can be achieved using this Blogger hack and some CSS styling.


Will This Blogger Hack Work on My Template?
I have tested this Blogger hack on both the old generation of Blogger templates (Minima and Sand Dollar) and the latest generation of default Blogger templates eg Simple. It will also work on custom templates as the comments code is likely to be very similar.

If you are using a custom Blogger template and run into difficulty you can also try this alternative method to highlight author comments in Blogger posts

How to Add CSS Styling to Author Comments in a Blogger Post
The following instructions will highlight author comments in the comments section of a Blogger post. The code creates a shaded box around the comments made by the blog author. These changes will not affect the CSS the styling of any of the other comments made.

Instructions to Add CSS Highlighting to Author Comments in Blogger

  1. Login to Blogger

  2. From the Dashboard go to Design > Edit HTML

  3. Back up your template by downloading it to your computer

  4. Check the Expand Widget Templates checkbox on the top righthand side

  5. Use CTRL + F by entering the following into the search box

    <dd class='comment-body'>

  6. Immediately above this line paste the following code:

    <b:if cond='data:comment.author == data:post.author'>
    <dd class='comment-body-author'>
    <p><data:comment.body/></p>
    </dd>
    <b:else/>

  7. Now look for this code block

    <dd class='comment-body'>
    <b:if cond='data:comment.isDeleted'>
    <span class='deleted-comment'><data:comment.body/></span>
    <b:else/>
    <p><data:comment.body/></p>
    </b:if>
    </dd>

    and paste </b:if> immediately after it.

  8. Your code will now look like this:

    <div expr:id='data:widget.instanceId + &quot;_comments-block-wrapper&quot;'>
    <dl expr:class='data:post.avatarIndentClass' id='comments-block'>
    <b:loop values='data:post.comments' var='comment'>
    <dt expr:class='&quot;comment-author &quot; + data:comment.authorClass' expr:id='data:comment.anchorName'>
    <b:if cond='data:comment.favicon'>
    <img expr:src='data:comment.favicon' height='16px' style='margin-bottom:-2px;' width='16px'/>
    </b:if>
    <a expr:name='data:comment.anchorName'/>
    <b:if cond='data:blog.enabledCommentProfileImages'>
    <data:comment.authorAvatarImage/>
    </b:if>
    <b:if cond='data:comment.authorUrl'>
    <a expr:href='data:comment.authorUrl' rel='nofollow'><data:comment.author/></a>
    <b:else/>
    <data:comment.author/>
    </b:if>
    <data:commentPostedByMsg/>
    </dt>


    <b:if cond='data:comment.author == data:post.author'>
    <dd class='comment-body-author'>
    <p><data:comment.body/></p>
    </dd>
    <b:else/>


    <dd class='comment-body' expr:id='data:widget.instanceId + data:comment.cmtBodyIdPostfix'>
    <b:if cond='data:comment.isDeleted'>
    <span class='deleted-comment'><data:comment.body/></span>
    <b:else/>
    <p>
    <data:comment.body/>
    </p>
    </b:if>
    </dd>

    </b:if>

    </dd>
    <dd class='comment-footer'>
    <span class='comment-timestamp'>
    <a expr:href='data:comment.url' title='comment permalink'>
    <data:comment.timestamp/>
    </a>
    <b:include data='comment' name='commentDeleteIcon'/>
    </span>
    </dd>
    </b:loop>
    </dl>
    </div>

  9. Now using CTRL + F again find this line ]]></b:skin>

  10. Paste the following immediately before ]]></b:skin>

    .comment-body-author {
    background: #f5deb3;
    border: 2px solid #de7008;
    padding: 5px;
    }

  11. Save your template changes

  12. Click on View Blog and go to a post that you have commented on to see the CSS styling has highlighted your comments.


Alternative Method to Add Highlighting to Author Comments in Blogger
The following method will also add highlighting to author comments in Blogger and can be used if you have difficulty with the first method. It does however involve changing some code rather than just adding some so this is not as desirable in terms of future proofing your template for Blogger updates.


  1. Login to Blogger

  2. From the Dashboard go to Design > Edit HTML

  3. Back up your template by downloading it to your computer

  4. Check the Expand Widget Templates checkbox on the top righthand side

  5. Find the following section of code by using CTRL + F and entering <data:comment.body/> into the search box

    <span class='deleted-comment'><data:comment.body/></span>
    <b:else/>
    <p><data:comment.body/></p>
    <b:include data='comment' name='commentDeleteIcon'/>
    </b:if>

  6. Replace with the following code after <span class='deleted-comment'> and before </b:if> as shown in red:

    <span class='deleted-comment'>
    <!--Highlight Author Comments Start-->
    <b:if cond='data:comment.author == data:post.author'>
    <p class='comment-body-author'><data:comment.body/></p>
    <b:else/>
    <p><data:comment.body/></p>
    </b:if>
    <!--Highlight Author Comments End-->

    </b:if>

  7. Use CTRL + F to find ]]></b:skin> that closes the CSS styling section

  8. Paste the following code immediately above ]]></b:skin>

    p.comment-body-author {
    background: #eeeecc;
    border: 2px solid #335577;
    padding: 5px;
    color:#558866;
    }

  9. Save your template

  10. Click on View Blog and navigate to a post that you have commented on to see the that your comments will now be highlighted


In this Blogger tutorial you have learned two different methods to add CSS styling to highlight the author comments in your Blogger posts. Obviously there is still some work to do on your part to adjust the colors in the CSS styling to match the color scheme of your blog. Good luck!


Related Articles
List of Blog Know How Tutorials for Blogger Blogs
Embedding a Comment Form Below Each Post
How to Get More Comments on Your Blogger Blog
Add Missing Embedded Comment Form to Blogger


Read more ...

Add CSS Styling to Blockquotes in a Blogger Template

Today I continue the series of Blogger tutorials (Blogspot tutorials) by showing you how to apply CSS styling to blockquotes in a Blogger template. Other articles I have already published on the subject of CSS styling include:

How to Add, Delete or Remove Blogger Image Borders
How to Align and Justify Posts in Blogger
How to Add a Divider Between Blogger Posts
How to Add or Change a Background Image in a Blogger Template.

Today's tutorial on Blogger blockquotes will be useful if you are using a default Blogger template or a third party custom template. It will show you how to change your blockquote area in the following ways:

  • Add a background color to the blockquote
  • Add a border around the background of the blockquote
  • Add or change the color of the blockquote text
  • Add or change padding around the text
  • Add or change the margin
  • Add a background image

Blogger beginners you can relax as I have written this Blogger tutorial with you in mind. I will walk you through the steps of styling the blockquote section and you will see that it is not as daunting as it first appears. This Blogger tutorial assumes no knowledge of CSS styling. I have rated the difficulty level as easy to medium because it does involve making adjustments to your Blogger template.

How to Change the Blockquote Section of a Blogger Template

First of all let's take a look at the CSS Styling for the blockquote section of a default Minima Blogger template.

.post-body blockquote {
line-height:1.3em;
}

.post blockquote {
margin:1em 20px;
}

.post blockquote p {
margin:.75em 0;
}

As you can see the blockquotes area of this Minima template has minimal styling. Apart from line height and margin indentation there has been no additional code added to improve the look of the template.

Minima Blockquotes No Extra CSS Styling
Let's go ahead and give the blockquotes in your Blogger posts some styling. I will use the Minima template to show you but you can do the same for another default template or custom template. As always back up your Blogger template by downloading it to your computer before you begin to make any changes.

  1. CSS Styling to Add a Background Color to Blockquotes
    Adding a background color to the blockquote area can be achieved in 1 of 2 ways.

    1. One way is to enter the hex color directly into the styling as I have done below. This code will add a light grey background to the blockquote area.

      .post-body blockquote {
      line-height:1.3em;
      background-color: #cccccc;
      }

    2. Another way to add a background color using CSS styling for the blockquote area is to make use of the variable names already set up. The border color is light grey #cccccc by default in a Minima template. The advantage of this option is that if you decide to change the border color under Layout > Fonts and Colors the blockquote color will automatically change to the new color too.

      .post-body blockquote {
      line-height:1.3em;
      background-color: $bordercolor;
      }

      If you wanted the background color to be the same as the blog title color rather than the border color you would write this instead

      .post-body blockquote {
      line-height:1.3em;
      background-color: $titlecolor;
      }

  2. CSS Styling to Add a Border Around Blockquotes
    You have your background in place now let's add a narrow border around the background to add some more definition. The following will add a 1px solid border around the outside of your blockquote area in your Blogger posts.

    .post-body blockquote {
    line-height:1.3em;
    background-color: #cccccc;
    border: 1px solid #cc6600;
    }

    or if using variables

    .post-body blockquote {
    line-height:1.3em;
    background-color: $bordercolor;
    border: 1px solid $titlecolor;
    }

    Blockquotes With a Background and Background Border
  3. CSS Styling to Add Padding Around Blockquotes
    Now if we were to leave the styling at this point one of the problems would be that the text would butt up against the background which is not a good look. To create some space between the text and the background edge all the way around we use CSS styling to add some padding like this:

    .post-body blockquote {
    line-height:1.3em;
    background-color: #cccccc;
    border: 1px solid #cc6600;
    padding: 20 px;
    }

    or if using variables

    .post-body blockquote {
    line-height:1.3em;
    background-color: $bordercolor;
    border: 1px solid $titlecolor;
    padding: 20 px;
    }

    Blockquotes With a Background, Background Border and Padding
  4. CSS Styling to Add or Change the Text Color of Blockquotes
    If you want to accent your blockquote area in your posts one effective way to do this is to make the blockquote text color a different color from the text color of your pages. We do this by picking a color and adding the following line to the code:

    .post-body blockquote {
    line-height:1.3em;
    background-color: #cccccc;
    border: 1px solid #cc6600;
    padding: 20 px;
    color: #cc6600
    }

    or if using variables

    .post-body blockquote {
    line-height:1.3em;
    background-color: $bordercolor;
    border: 1px solid $titlecolor;
    padding: 20 px;
    color: $titlecolor;
    }

    Blockquotes With a Background, Background Border, Padding and Change of Text Color

Tips and Troubleshooting
If you want to add further modifications to the blockquotes area of your Blogger template here are several other possibilities.

  1. CSS Styling To Change the Margin of Blockquotes
    You can increase the margin from 1em to 1.5em by changing the margin line to
    margin: 1.5em 20px;

  2. CSS Styling to Add a Background Image to Blockquotes
    You can have your own image as a background in your blockquotes area of your posts by adding this line:

    background: url(http://URL of your image.jpg);

In today's Blogger tutorial (Blogspot tutorial) you have learned how to add CSS styling to the blockquotes area of your Blogger posts. I have shown you how to add a background, a background border, change the text color, add padding, change the margin and add a background image to the blockquotes code block. If you have a moment please let me know how you got on customizing your own Blogger template. Any questions please ask.


Related Articles
List of Blog Know How Tutorials for Blogger Blogs
How to Add, Delete or Remove Blogger Image Borders
How to Align and Justify Posts in Blogger
How to Add a Divider Between Blogger Posts
How to Add or Change a Background Image in a Blogger Template


Read more ...
All Tips And Tricks Information Computer tricks in tamil Hindi Mobile tips tricks 2013 HAcking tricks Airtel Idea Vodafone Tata Docomo Tricks internet